I had heard about Fujifilm colors and how good they are, but I never truly experienced it until I got my Fujifilm X100VI. That’s when I fell in love not just with a camera, but with the way it rendered the world.
If you shoot Fujifilm, you’ve likely noticed the JPEGs straight out of camera have a character, a warmth and depth, that other manufacturers struggle to replicate. You can’t quite fake this magic in Adobe Lightroom, and there is a scientific reason why.
The Secret: 90 Years of Color Science
Fujifilm wasn’t originally a camera company, they were a chemistry company. Founded in 1934, they spent decades perfecting emulsions like Fujichrome Provia (neutral), Velvia (vivid), and Superia (forgiving).
When they built digital cameras, they didn’t just create a “Vintage Filter.” They reverse-engineered their physical film stocks, measuring how they reacted to light, grain structure, and color interplay, and encoded that deep data into the camera’s processor.
The Man Behind the Color: Susumu Minami
At the heart of this transition from analog to digital is Susumu Minami, Fujifilm’s color specialist for over 50 years. Minami-san didn’t just work on film emulsions, he lived them. His deep understanding of how Fujifilm’s classic film stocks rendered color became the foundation for translating that chemistry into digital algorithms.
When Fujifilm needed to bring their legendary color science from film to digital sensors, Minami was the bridge. He understood that accurate color wasn’t the goal, emotional color was. As he’s noted, “color by numbers is not what photographers or artists do.” This philosophy is why Fujifilm’s Film Simulations don’t just reproduce colors accurately, they reproduce the feeling of shooting with Velvia on a sunny day or Acros in moody light.
Why “Film Simulations” Are Not Just Presets
Most people think Film Simulations are just color sliders. They aren’t. They are deep algorithms baked into the hardware that manipulate the data from the X-Trans sensor.
- Complex Color Depth: In real film, pushing saturation in red affects how greens look. Fujifilm’s algorithms mimic this chemical interdependence.
- Dynamic Grain: In modes like Acros, grain isn’t just a texture paste. It behaves like real silver halide, heavier in shadows, lighter in highlights.
- Sensor Optimization: These simulations are tuned specifically for Fujifilm’s unique X-Trans color filter array (a complex 6×6 pixel grid) rather than the standard Bayer array (2×2 grid) used by Canon and Sony.
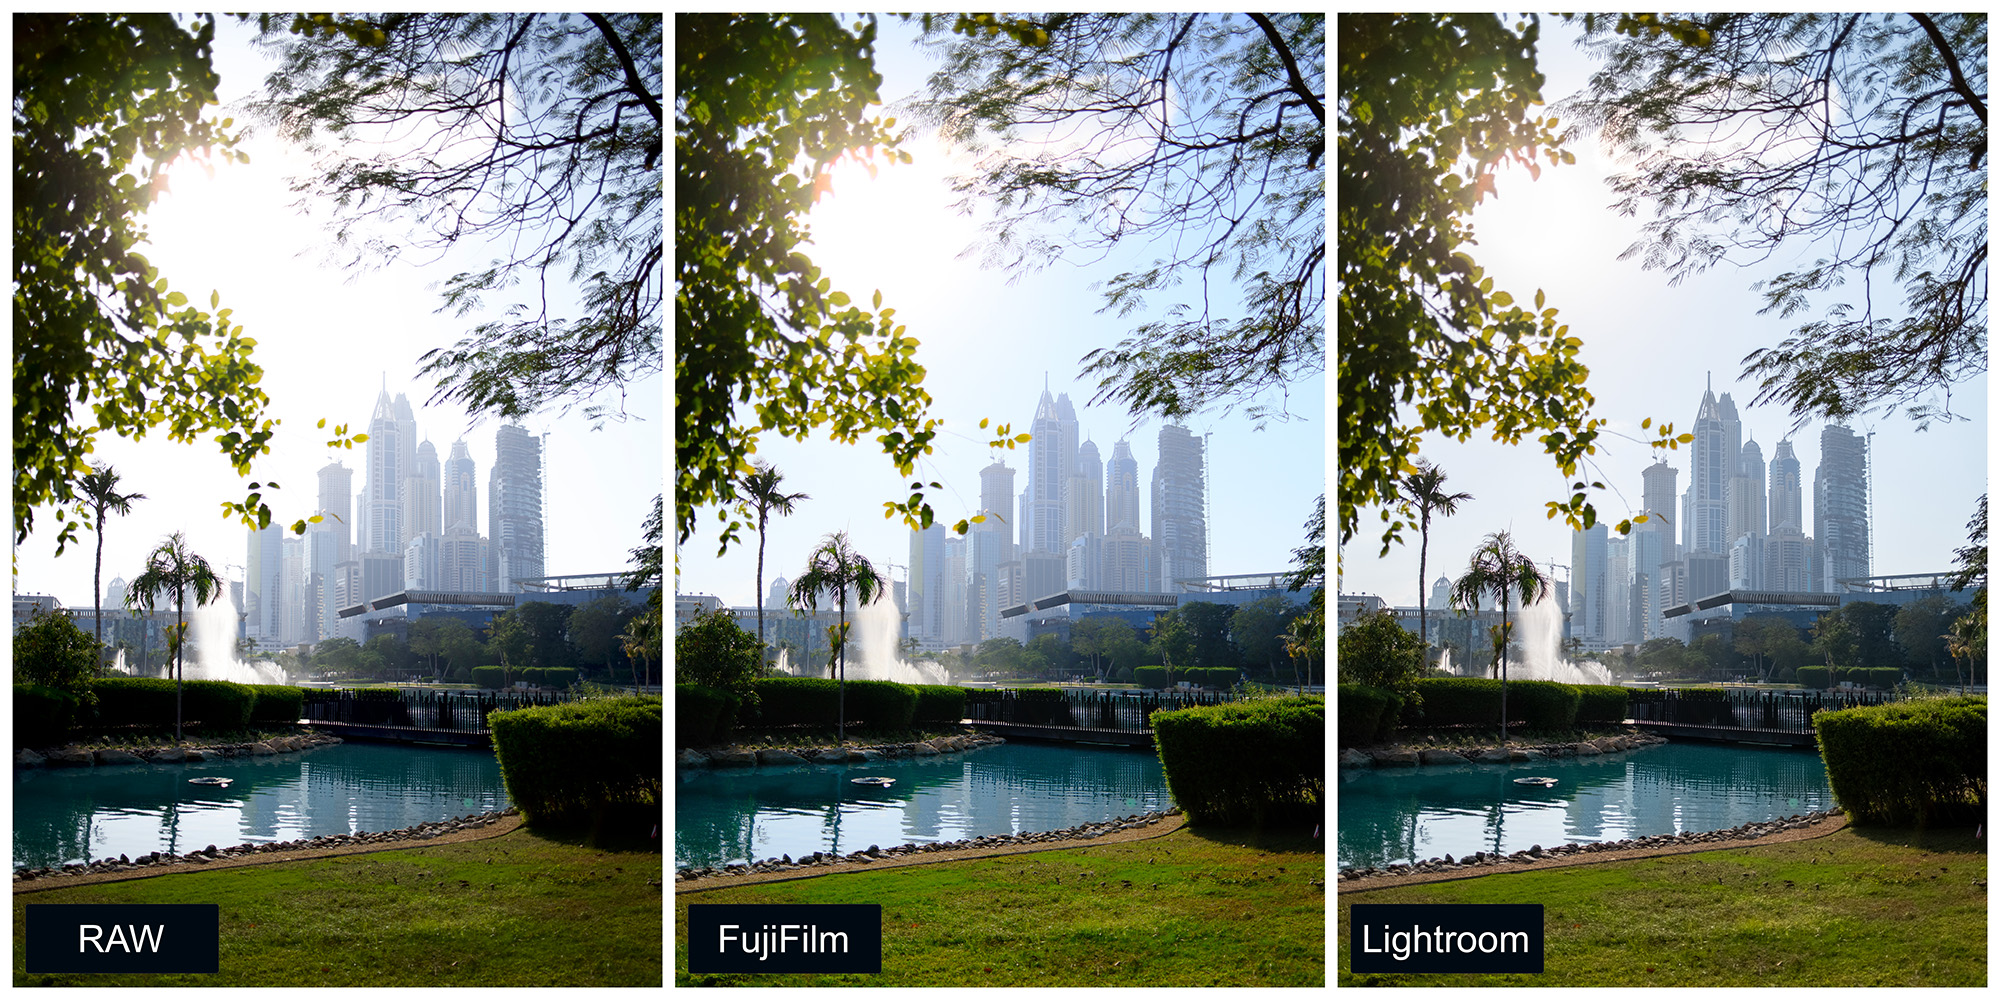
Why Lightroom Can’t Clone It
Adobe Lightroom and Capture One are incredible tools, but they are applying general math to your raw files. They don’t have access to Fujifilm’s proprietary processing algorithms.
- The “Worms” Issue: Because Adobe’s sharpening tools are designed for standard Bayer sensors, they sometimes create “worm-like” artifacts when processing Fujifilm X-Trans files.
- Approximation vs. Reality: Adobe’s “Camera Matching” profiles are essentially a cover band playing a Beatles song. It sounds close, but the soul is different.
The Workflow Cheat Code: RAW + JPEG
Most photographers choose between the safety of RAW or the convenience of JPEG.
The pro move is to shoot RAW + JPEG.
- The JPEG gives you a finished, beautiful image immediately (using the camera’s superior color engine).
- The RAW (RAF) gives you a safety net if exposure was off.
How to Set It (X100VI)
- Press MENU → Image Quality Setting → Image Quality.
- Select FINE + RAW.
Now you get the best of both worlds with every click.
The Superpower: Fujifilm X RAW STUDIO
This is the tool 90% of users ignore. X RAW STUDIO is free software that lets you plug your camera into your computer and use the camera’s actual processor to edit your photos.
Instead of your computer guessing how Velvia looks, your camera processes the RAW file exactly as if you had shot it that way originally.
Critical Step: Connecting Correctly
For the software to see your camera, you must change the USB mode.
On the X100VI (and most new models):
- Press MENU → Setup (Wrench Icon).
- Go to Network/USB Setting → Connection Mode.
- Select USB RAW CONV./BACKUP RESTORE.
- Note: Do not select “USB TETHER SHOOTING”—that is for Lightroom/Capture One.
The X RAW STUDIO Workflow
- Shoot your photos in RAW + JPEG.
- Connect your camera to your Mac/PC via USB-C.
- Open X RAW STUDIO and select your RAW files.
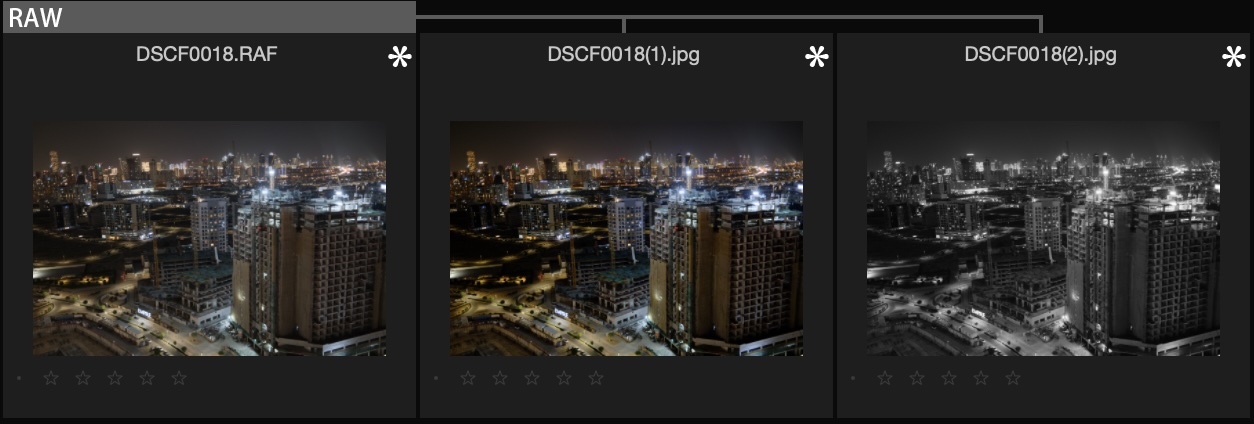
- Experiment: In real-time, swap Film Simulations. Turn a standard Provia shot into a moody Classic Neg or a high-contrast Acros.
- Export: The software uses the camera to generate a new JPEG that is pixel-identical to an in-camera shot.
Why this wins: You can shoot a whole session in standard color, then “re-develop” the whole roll as Black & White later, with zero loss in quality.
Creating “Recipes”: Custom Settings
You aren’t limited to the default look. You can create “Recipes” with custom tweaks to film simulations that act like your own signature film stock.
How to Build a Recipe (X100VI)
- Press MENU → Image Quality Setting.
- Select Edit/Save Custom Setting.
- Choose a slot (C1-C7) and select Edit/Check.
- Customize:
- Film Simulation: Classic Chrome (for a documentary look)
- Grain Effect: Strong / Large
- Color Chrome Effect: Strong
- White Balance: Auto (White Priority) + Red: 2, Blue: -4 (adds warmth)
- Dynamic Range: DR400 (saves highlights)
- Tone Curve: Highlights -1, Shadows +2
- Press BACK and select Save Current Settings.
Now, anytime you want that specific “Golden Hour” look, just switch to C1.
The Practical “Hybrid” Workflow
Here is how to use this ecosystem without overcomplicating your life:
- The Setup: Configure your camera to RAW + FINE. Program C1 with your favorite “Recipe” (e.g., a warm Classic Chrome).
- The Shoot: Shoot freely. Your viewfinder shows the finished look.
- The Import: Copy everything to your computer.
- Scenario A (Perfect Shot): The JPEG looks great. Deliver it / Post it. Done.
- Scenario B (Needs a Remix): You nailed the focus, but the mood is wrong. Connect the camera, open X RAW STUDIO, and swap the simulation from Classic Chrome to Reala Ace or Acros. Export a new JPEG.
- Scenario C (Rescue): The exposure is way off. Open the RAW in Lightroom/Capture One and fix it manually.
The Bottom Line
Fujifilm cameras are not just capture devices, they are creative engines. By using RAW + JPEG and X RAW STUDIO, you stop fighting with software to “get the look” and start spending more time actually shooting.
Stop trying to fake film. Use the camera that has film in its DNA 🙂
